


How to Add Survey Form on LearnDash Course

Forms play a key role in every Learning Management System (LMS). Whether you use them for feedback, market research, or student satisfaction, a LearnDash survey helps you collect useful information from your learners.
These surveys show what students really think about your courses and learning platform. They help you understand what’s working well and what needs improvement.
Many LearnDash users struggle to find an easy way to collect feedback directly inside their courses. The Solution is, LearnDash doesn’t offer built-in survey options, but you can still create a professional course survey form with a third-party Learndash Survey plugin that’s called Gravity Forms.
Keep reading this, because you’ll know exactly how to add a LearnDash survey using Gravity Forms, so you can gather feedback, track satisfaction, and improve your course performance without technical hurdles.
Why You Need Survey Forms in LearnDash
Let’s imagine! You have a LearnDash course but no way to collect student feedback. This will cost you in terms of growth because real feedbacks helps you improve your courses.
A LearnDash survey form plays a vital role in improving the learning experience. It allows you to measure how your students feel about your lessons, instructors, and overall platform usability.
When you create a course survey form, you open the door to valuable insights. Learners can share their opinions about the pace, clarity, and quality of your content. These insights help you refine future lessons, improve course flow, and build stronger engagement.
Here’s why every LearnDash instructor should use survey forms:
- Get feedback directly inside your LMS.
- Understand learner satisfaction and behavior.
- Identify areas that need improvement.
- Build trust by showing you value student opinions.
Without surveys, it’s hard to understand what learners actually think.
We’ll show you how to create a LearnDash survey form for your course. The steps are simple and easy to follow, so make sure to read carefully and apply them to your LearnDash course.
By Using a New Gravity Form Plugin
The easiest way to add a survey form in LearnDash course is by using the Gravity Forms plugin. Gravity Forms for LearnDash makes it possible to collect responses right inside your LMS.
This plugin allows you to build any kind of survey from simple star ratings to detailed feedback questions on your course, lessons or quizzes.
You can embed the survey on a page or post using the Gravity Forms shortcode.
Once learners complete the survey, you can track their responses from your WordPress dashboard.
Let’s walk through the exact steps to create the form.
Step 1: Download Gravity Forms
Visit the official Gravity Forms website and choose a plan that suits your needs.
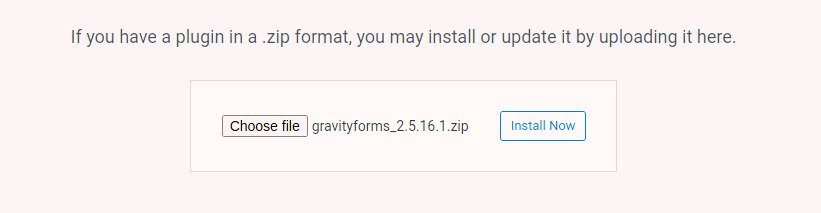
After purchasing a license, download the plugin as a .zip file. Keep it on your computer so you can upload it later.
Step 2: Upload the Plugin to WordPress
Log in to your WordPress admin dashboard. Go to Plugins > Add New, then click Upload Plugin. Locate the Gravity Forms .zip file and upload it.
Once the upload is complete, you’re ready to move on to installation and activation.
Step 3: Install and Activate
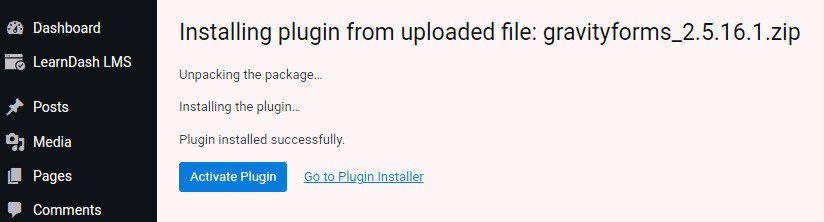
Once you have uploaded the file. Click Install Now and wait a few seconds.
After installation, select Activate Plugin. Once active, you’ll see a new “Forms” tab appear in your WordPress dashboard.
This section is where you’ll create and manage all your LearnDash survey forms.
Step 4: Access the Forms Tab
From your WordPress dashboard, click Forms. This is your central hub for creating, editing, and viewing form entries.
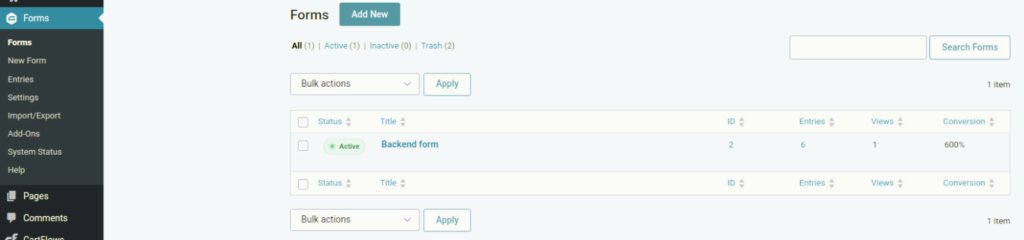
Gravity Forms LearnDash integration makes it possible to connect the two platforms easily. You’ll manage form structure here, and later you’ll link it to your LearnDash course lesson.
Step 5: Create a New Gravity Form
Click Add New and enter a name and short description for your course survey form. Keep the title simple and clear, such as “Student Feedback Survey” or “Course Satisfaction Form.”
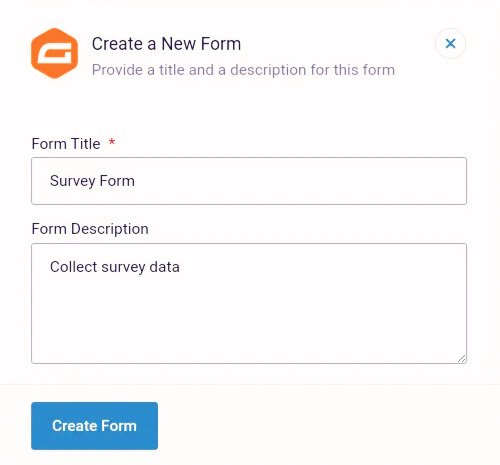
After setting your form name, click Create Form. You’ll now enter the main form editor where you can start adding questions and elements.
Step 6: Form Editor
After you click “Create Form” and add the form title and description, you’ll see a screen where you can drag and drop elements to build your own LearnDash survey form easily.
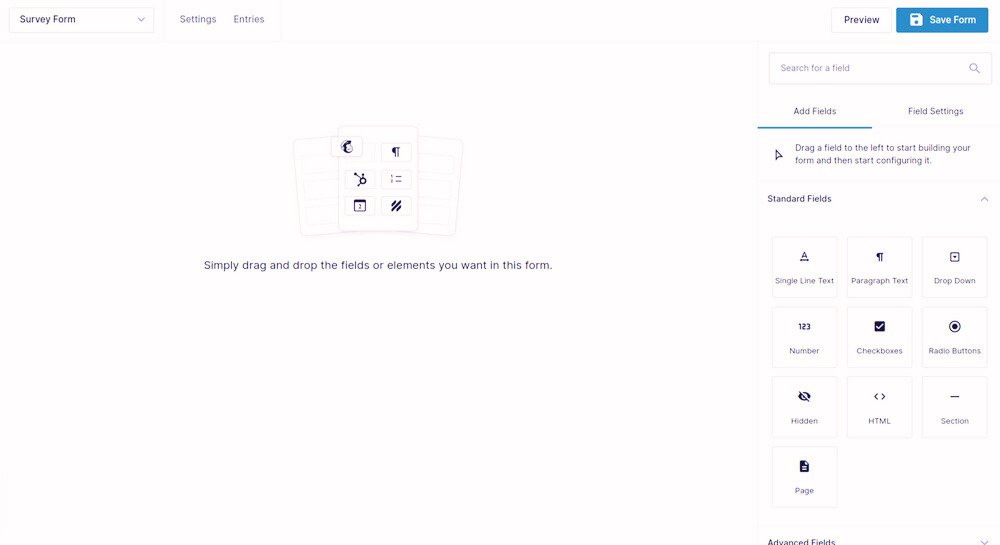
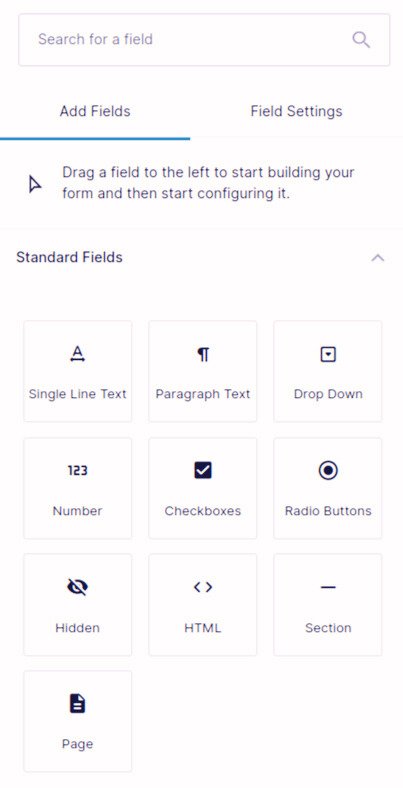
Step 7: Add Fields
On the right panel, you’ll see standard and advanced field options. Drag the ones you need into your form area.
Examples include:
- Name and email (optional for tracking)
- Star rating or scale field
- Short text answers for comments
- Multiple-choice questions for clarity feedback
Customize each field label and description to make it student-friendly. Avoid long or complicated wording; simple questions encourage more responses.
Step 8: Preview Your Form Once Created
After you finish designing your survey, click Preview to test how it looks on the front end. Make any necessary changes to layout, wording, or field order.
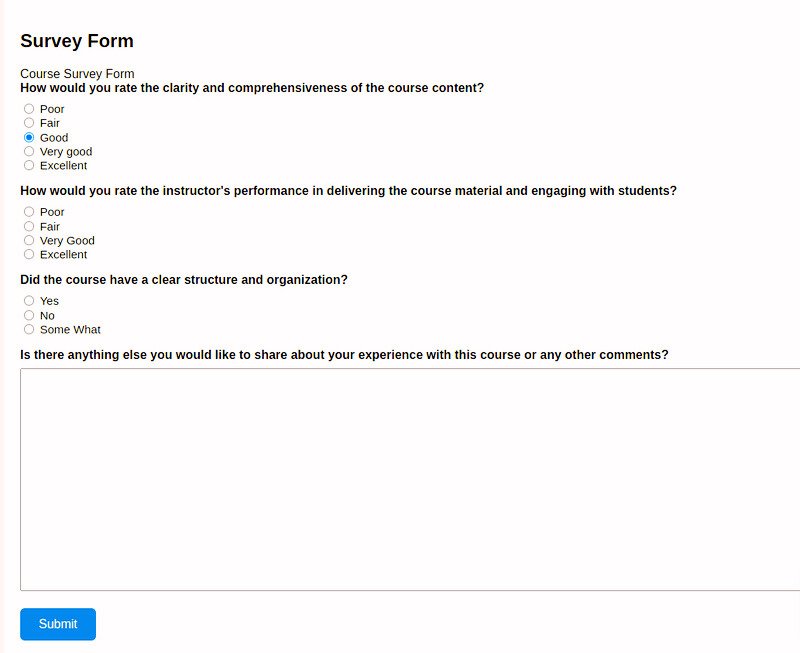
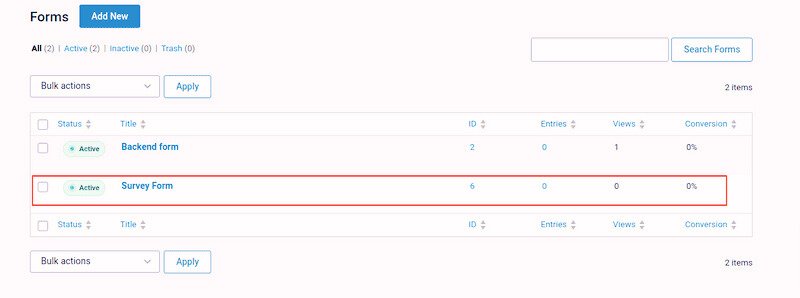
Once you’re satisfied, click Save Form. You can now see your newly created form under the forms tab.
Adding the Gravity Form to a LearnDash Lesson
Now that your form is complete, it’s time to add it to your course so students can see and submit responses. This process connects Gravity Forms with your LearnDash lessons, allowing seamless integration.
Step 9: Create a New Lesson
Go to LearnDash LMS > Lessons and click Add New. Give your lesson a title such as “Course Feedback Survey.”

You can choose to make this the final lesson in your course to collect feedback after completion.
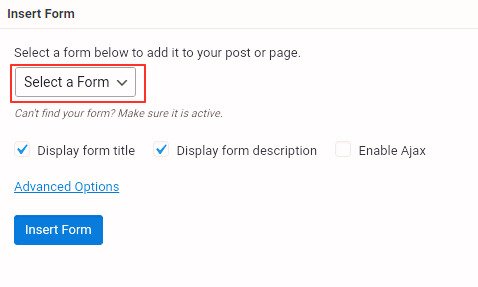
Step 10: Insert the Form
In the lesson editor, click the Add Form icon. A pop-up will appear allowing you to select which Gravity Form you want to embed. Choose the survey form you just created and click Insert Form.
Step 11: Use the Shortcode
If you prefer, you can manually add the Gravity Forms shortcode. Copy the shortcode from your Forms list and paste it into your lesson content area.
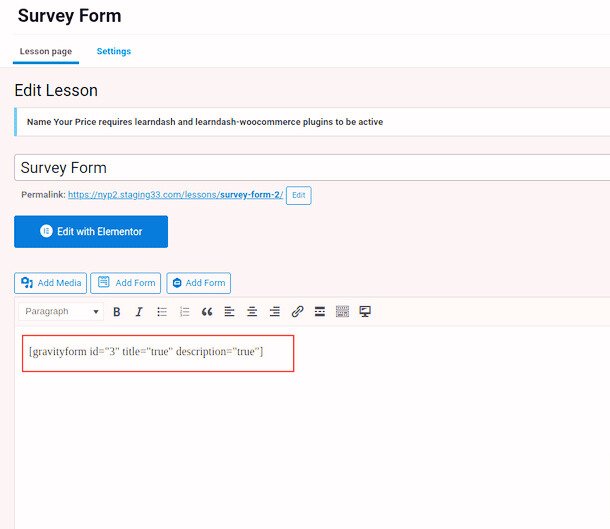
This shortcode automatically displays your LearnDash survey form inside that lesson when viewed by students.
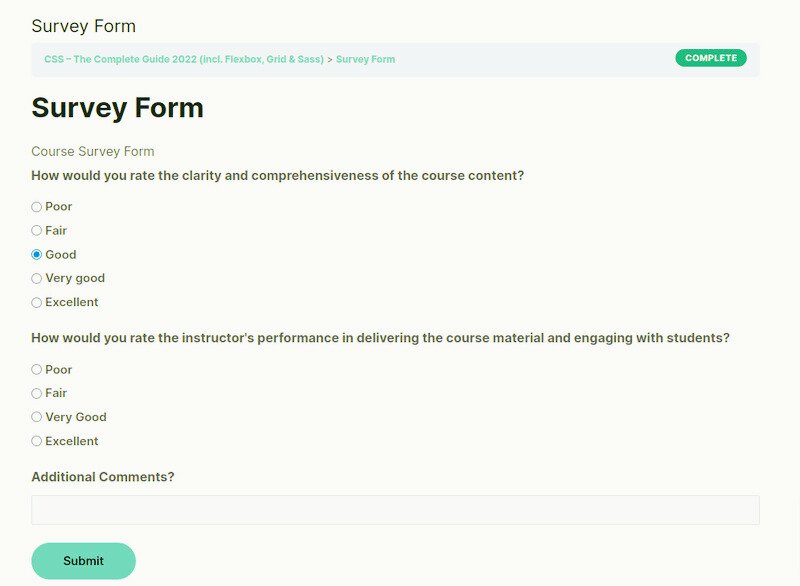
Step 12: Preview the Survey Lesson
Save and update the lesson, then click Preview. You should see the full course survey form displayed on the page.
Test it to make sure it’s submitting responses correctly. You can also adjust the placement or add a short message encouraging students to fill it out.
Step 13: Set It as the Final Lesson
To ensure all learners complete the survey before finishing the course, add this survey lesson as the last step in your course builder.
Place it after the final quiz or project. This way, the LearnDash survey becomes part of the learning journey rather than an optional extra.

Restrict Course Completion Until the Survey Is Submitted
If you want to make the survey mandatory, you can use a small script that hides the “Mark Complete” button until the form is submitted. This ensures every student completes the LearnDash survey before progressing.
You can find a sample code snippet for this setup in community tutorials such as those on SaffireTech. It uses the Gravity Forms API and WordPress hooks to detect when a form entry has been submitted.
This step is optional but highly effective if you want full participation and reliable feedback data.
For more detailed customization help, visit our LearnDash customization Services.
Wrapping Up
Adding a survey form to your LearnDash course is a simple yet powerful way to improve your eLearning experience. By using Gravity Forms LearnDash integration, you can create custom feedback tools that connect directly with your lessons.
A well-designed LearnDash survey helps you understand your learners, improve course content, and demonstrate that you value student opinions. Follow these steps, and your course will soon include an engaging feedback system that supports continuous improvement.
For more guidance on Gravity Forms and LearnDash survey setup, you can Book a Free Consultation Call with our Experts!