


How to Display All LearnDash Certificates on One Page

Displaying LearnDash certificates in one place is a common request from course creators and learners. Many users complete multiple courses but struggle to find a centralized location for downloading or reviewing their earned certificates.
The good news is that LearnDash gives you several methods to display every earned certificate showing on a single page. This makes it simple for users to find and save their LearnDash certificates without searching through multiple pages.
Once you understand these options, you can create a professional, centralized certificate display that improves both user experience and admin control.
Let’s explore!
Why You Need To Organize LearnDash Certificates on one Page
When your students complete their courses, their certificates are stored in different locations in Learndash.
Instead of checking each course separately, A single page makes it easier to find, download, and showcase achievements from one location. It also gives your LMS a professional look.
For administrators, it makes record keeping simple. When learndash certificates are displayed together it’s easier to answer learners’ questions, verify completion, and review their progress.
ONE IMPORTANT THING IS THAT:
It also makes it easy to track learning activity through LMS analytics and improve reporting.
3 Simplest Methods to Display Learndash Certificates on One Page
There are three ways to display certificates together:
- Shortcode method: Easy to set up and doesn’t need any extra plugins.
- With Plugin: Gives more styling and layout options without writing code.
- Custom page method: Best for developers who want complete control and a unique design.
Method 1: Using LearnDash Shortcodes (No Plugin Needed)
This is the quickest way to show all user certificates.
Step 1: Create a New Page
- Go to your WordPress Dashboard.
- Click Pages → Add New.
- Enter a title like “My Certificates”.
Step 2: Add the LearnDash Shortcode
- In the content area, paste the LearnDash shortcode that displays certificates.
- You can find the shortcode in the LearnDash documentation or plugin settings.
Example shortcode:
[ld_user_certificates]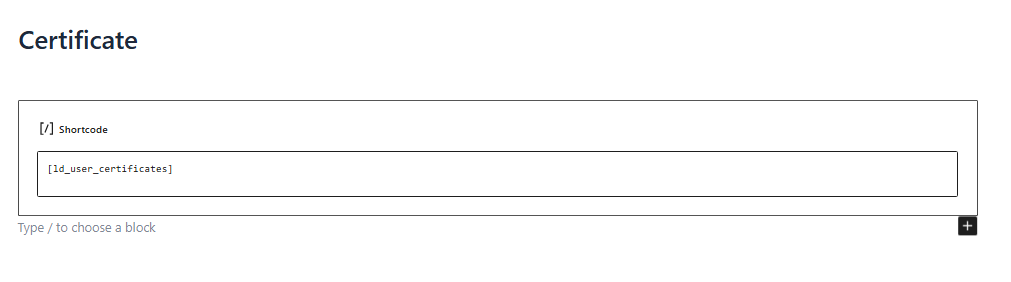
Step 3: Publish and Test
- Click Publish to make the page live.
- Log in as a learner and open this page.
- You will see a list of all the certificates that the user has earned.
Step 4: Adjust Display Settings
- You can use shortcode attributes to control layout, number of certificates, and sorting.
- Check the mobile view to ensure the layout looks good on all devices.
This method is best for quick setups and clean layouts.
Method 2: Using a Certificate Display Plugin (Optional)
If you want more control over styling and features, use a plugin. Many plugins provide ready-made layouts and widgets.
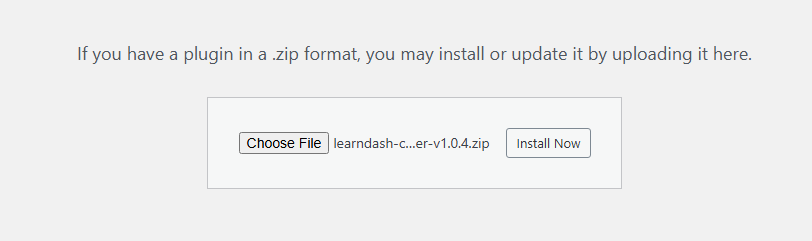
Step 1: Install the Plugin
- Go to Plugins → Add New.
- Click Upload Plugin if it’s a premium plugin, or search the plugin name if it’s free.
- Click Install Now → Activate.
Step 2: Configure the Plugin
- After activation, find the plugin settings in the dashboard.
- Choose the display style, columns, and layout for the certificates page.
Step 3: Add Plugin Shortcode or Widget
- Go to Pages → Add New (or edit an existing page).
- Add the plugin’s shortcode or widget in the content editor.
- Save or publish the page.
Step 4: Test as a Learner
- Log in with a learner account and check the page.
- Make sure certificates load correctly and the design matches your theme.
Plugins are ideal for LMS owners who want custom layouts without coding.
Method 3: Creating a Custom Certificate Archive Page
This method is for developers or advanced users, who can build a fully custom certificate page.
Step 1: Create a Page Template
- In your WordPress theme folder, create a new file like page-certificates.php.
- Add WordPress template headers and structure the layout.
Step 2: Pull Certificate Data
- Use LearnDash functions (such as learndash_user_get_certificates) to fetch all certificates for the logged-in user.
- Loop through the data to display titles, download links, and completion dates.
- If you’re not familiar with WordPress template structure, this official WordPress Developer guide is a great resource to understand how custom page templates work.
Step 3: Add Styling
- Use CSS to match your site’s branding.
- You can add grid layouts, borders, or buttons for a polished look.
Step 4: Assign the Template
- In WordPress, create a new page and assign this custom template from the Page Attributes section.
- Publish the page and test it.
This method gives full design freedom and is perfect for branded LMS portals.
Looking to take your LearnDash layout even further? You may also want to check out our guide on:
How to Customize LearnDash Course Page for Maximum Impact to enhance your overall course experience while keeping certificates and dashboards aligned.
Styling and Personalizing the Certificate Page
A well structured and good looking certificate page reflects your brand identity. You can use CSS to adjust colors, typography, and spacing. This creates a professional look of your LMS.
Page builders like Elementor or Gutenberg blocks allow you to structure content visually. You can add headings, columns, or background sections without touching code.
Always make sure the design works well on mobile devices. Keep the layout simple, avoid clutter, and make download buttons clear.
Common Issues and How to Fix Them
Sometimes instructors or coaches face common issues in learndash and they don’t know how to fix them.
Here are a few common problems:
- Certificates not appearing: Ensure that the user is logged in and that the course has a certificate assigned.
- Incorrect shortcode output: Double-check shortcode syntax and placement.
- Wrong user display: Use user-specific shortcodes and confirm that caching is not causing display errors.
- Plugin conflicts: Temporarily disable other plugins to identify the source of the problem.
Addressing these issues early ensures a smooth experience for learners.
You can get professional help from our LearnDash developers to set up multiple certificates, fix display issues, and make your LMS run smoothly without the hassle.
Expert Advice: Advanced Tips for LMS Admins
Admins can take the certificate page further by adding role-based displays, so different learners see different sets of certificates. You can also use category filters to group certificates by course type or subject.
If your LMS supports multiple languages, create language-specific layouts to give learners a localized experience.
Integrating certificate data with LMS analytics lets you track learner progress in a structured way, giving valuable insights for future improvements.
Frequently Asked Questions
Can I show certificates without a plugin?
Yes, the shortcode method works without any plugins. It is fast to set up and ideal for simple layouts.
Will it work with any LearnDash theme?
Most themes support shortcode output, but always test to ensure styling is consistent.
Can learners download all certificates at once?
By default, LearnDash does not offer bulk downloads. Some plugins or custom code can add this feature.
Does this affect site speed?
A single certificate page does not significantly impact speed if optimized correctly. Avoid loading unnecessary scripts.
How to make certificates mobile-friendly?
Use responsive layouts and test on different screen sizes. Keep the design clean and buttons large enough for easy tapping.
Conclusion:
Displaying all LearnDash certificates on a single page improves both learner experience and administrative efficiency.
Whether you use shortcodes, plugins, or a custom approach, the key is choosing a method that aligns with your site’s structure and design goals.
With a well-planned layout, your certificate page becomes a trusted and organized space for learners to celebrate their progress.