


How to Add Gradient Text in Elementor: Complete Guide

Have you tried to add gradient text in Elementor only to discover there isn’t a built-in setting for it? Many designers face this frustration because Elementor focuses on layouts, typography, and color control but leaves out gradient text options.
The solution is simple: you can achieve gradient heading Elementor effects with a few lines of CSS or by using lightweight techniques that don’t require buying premium add-ons.
In this guide, we’ll show you how to make gradient text in Elementor, explain multiple methods, and share expert design tips to help your text stand out. By the end, you’ll know how to create eye-catching typography on websites.
Why Use Gradient Text in Elementor
Gradient text has become a common feature in modern web design. Unlike solid colors, gradients add depth, dimension, and visual appeal. When applied to headings, call-to-actions, or banners, they immediately catch the eye and enhance user engagement.
Key benefits include:
- Highlighting important titles or sections
- Making branding colors more memorable
- Improving user experience by breaking monotony
- Adding a professional creative touch without clutter
For course creators, LMS websites, and membership sites, using gradient text in Elementor can also help you guide learners’ attention to the most important information.
Methods to Create Gradient Text in Elementor
There are multiple ways to achieve gradient text in Elementor. We’ll walk through the most reliable methods, starting with the free approach using custom CSS.
Method 1: Add Gradient Text with Custom CSS (Free)
This is the most popular and flexible way to create gradient text Elementor effects without relying on extra plugins.
Step 1: Open Your Page in Elementor
- Go to your -> WordPress dashboard
- Navigate to Pages > Add New or choose an existing page
- Click Edit with Elementor to launch the builder
Step 2: Insert a Heading Widget
- Click the + icon to add a new section
- Choose a single-column structure
- Drag the Heading widget into the section
Step 3: Add Custom CSS
If you are using Elementor Pro, you have a Custom CSS tab under the Advanced settings of each widget.
Paste the following code:
selector {
background: linear-gradient(90deg, #ff7a18, #af002d 80%);
-webkit-background-clip: text;
-webkit-text-fill-color: transparent;
}
This creates a left-to-right gradient. Change the color values (#ff7a18 and #af002d) to match your brand colors.
Step 4: Customize Gradient Direction and Style
- 90deg = left to right
- 180deg = top to bottom
- You can add more than two colors for a multi-layer gradient
For example:
selector {
background: linear-gradient(300deg, #8982fd, #6025c9, #dc08df);
-webkit-background-clip: text;
-webkit-text-fill-color: transparent;
}
This creates a three-color gradient effect.
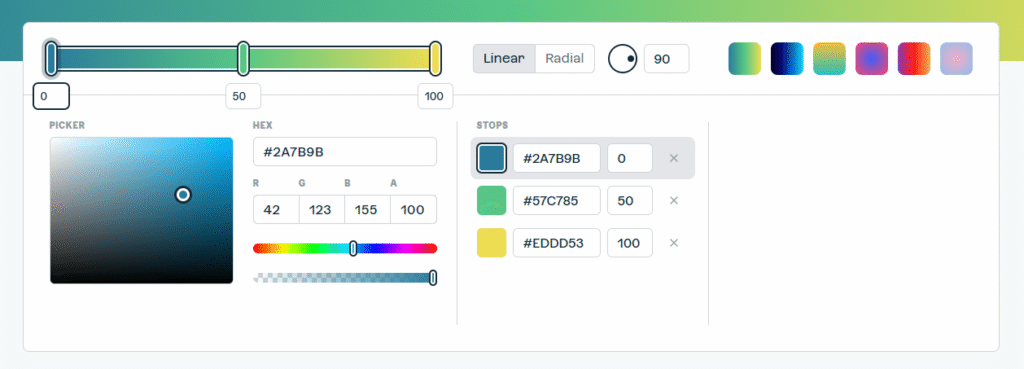
If you wanted to your own I will recommended to you CSS Gradient.
Method 2: Use Elementor Gradient Text Plugins
If you prefer not to work with CSS, there are third-party addons that provide ready-to-use gradient text widgets. Popular options include:
- Happy Addons Gradient Widget
- Unlimited Elements Gradient Text
These plugins allow you to adjust gradients visually with a color picker. However, they add extra code to your site and may not be necessary if you’re comfortable using CSS.
Method 3: Create Gradient Text with Background Layers
Another creative trick is to apply a gradient background to a section and then set the text fill to transparent. This technique works best for large headings:
- Add a heading widget
- Apply gradient background to the column or section
- Set the text color to transparent
- Adjust positioning so the background shows through the text
This method is less flexible but useful if you don’t want to edit CSS.
Keep an Eye on This: Gradient Text Effect for Elementor
Best Practices for Gradient Text Elementor Designs
While gradient text can elevate your design, overusing it can reduce readability. Here are some expert tips:
- Use on headings, not body text: Long paragraphs in gradients are hard to read
- Keep good contrast: Ensure your gradient has enough contrast to be visible against the page background
- Match brand colors: Gradients should complement your existing color scheme
- Test on mobile: Small screens may render gradients differently
Advanced CSS Tricks for Gradient Text
For those who want to push creativity further, consider:
- Animated gradients: Add keyframe animations for text that shifts colors
- Radial gradients: Replace linear-gradient with radial-gradient for a circular effect
- Hover effects: Create gradient changes when users hover over text
Example hover effect CSS:
selector {
background: linear-gradient(45deg, #ff007a, #00d4ff);
-webkit-background-clip: text;
-webkit-text-fill-color: transparent;
transition: 0.5s ease-in-out;
}
selector:hover {
background: linear-gradient(45deg, #00d4ff, #ff007a);
}
Common Mistakes to Avoid
- Using too many colors that reduce readability
- Applying gradients on small text where detail is lost
- Forgetting accessibility always test with screen readers and color contrast checkers
Conclusion
Learning how to make gradient text in Elementor is easier than it seems. With a little CSS or the help of a plugin, you can design bold, modern typography that enhances your site’s appeal.
Whether you run a course platform, membership site, or eLearning portal, gradient text Elementor effects can highlight your most important content and improve user engagement.
If you’d like professional support in building custom LearnDash, LMS, or membership websites, we are here to assist you check out our expert services at SOLBASE Technologies.